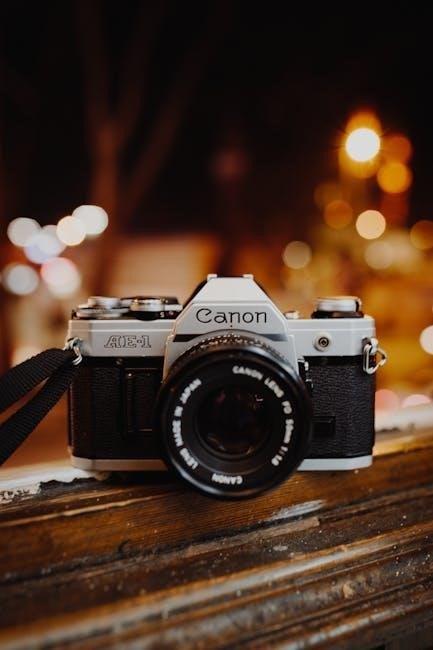
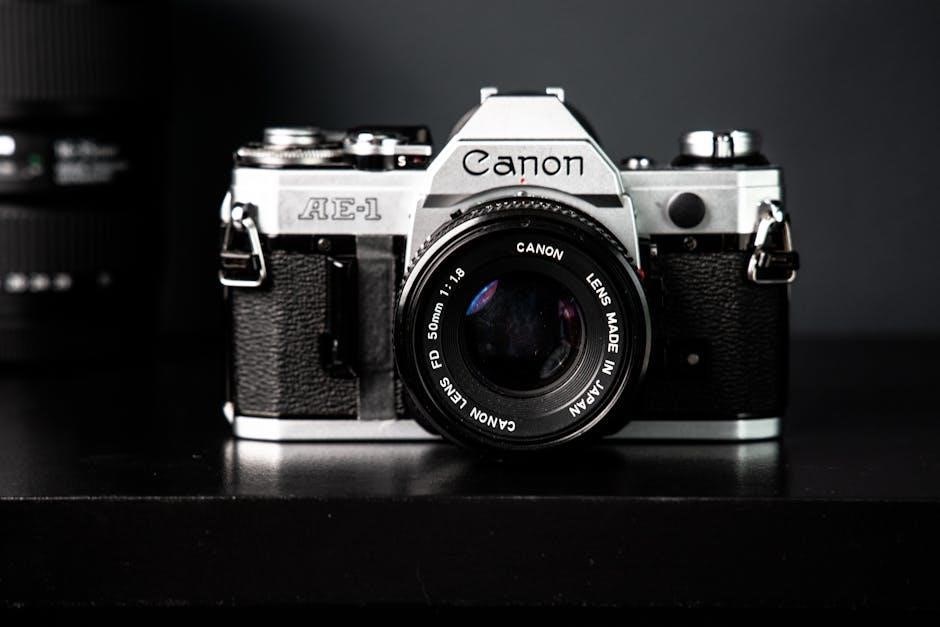
The Canon AE-1, released in 1976, is a legendary 35mm SLR film camera renowned for its durability, intuitive design, and advanced features, making it a favorite among photographers.
1.1 Overview of the Canon AE-1 Camera
The Canon AE-1 is a legendary 35mm single-lens reflex (SLR) camera introduced in 1976. Known for its durability and intuitive design, it became a favorite among professionals and hobbyists alike. The camera features a robust build with a copper-aluminum alloy shutter and a user-friendly interface. Its ergonomic design makes it comfortable to hold and operate. The AE-1 is compatible with Canon’s FD-mount lenses, offering versatility for various photography needs. With its mechanical and electronic components, the AE-1 delivers reliable performance, making it a timeless choice for film photography enthusiasts. Its popularity endures as a classic tool for capturing memorable moments.
1.2 Importance of the Canon AE-1 Manual
The Canon AE-1 manual is essential for mastering this iconic camera. It provides detailed instructions for operating the camera’s features, ensuring users can fully utilize its capabilities. The manual explains aperture priority, manual modes, and program auto-exposure, helping photographers achieve precise control over their shots. It serves as a reference for troubleshooting common issues and optimizing settings. For both beginners and experienced photographers, the manual is a vital resource to unlock the AE-1’s full potential. It bridges the gap between technical complexity and creative photography, making it indispensable for anyone using this legendary camera.
Key Features of the Canon AE-1
The Canon AE-1 offers aperture priority, manual modes, and program auto-exposure, with compatibility for Canon FD lenses, making it a versatile tool for creative photography.
2.1 Aperture Priority and Manual Modes
The Canon AE-1 features Aperture Priority and Manual modes, offering photographers precise control over exposure. In Aperture Priority, users set the aperture, and the camera automatically adjusts the shutter speed for optimal exposure. This mode is ideal for controlling depth of field. Manual mode provides full creative freedom, allowing photographers to set both aperture and shutter speed independently. The camera’s built-in light meter assists in manual adjustments, making it easier to achieve the desired exposure. These modes cater to both professionals and enthusiasts, enabling creative expression and technical precision in photography.
2.2 Program Auto-Exposure Mode
The Program Auto-Exposure mode on the Canon AE-1 simplifies shooting by automating both aperture and shutter speed settings. This mode is designed for quick and hassle-free photography, making it perfect for casual shooters or those who want to focus on composition. The camera analyzes the scene and selects the best exposure combination, ensuring well-balanced results in various lighting conditions. While it limits manual control, it offers a reliable option for capturing sharp, well-exposed images without the need for extensive technical adjustments. This mode is a versatile tool for photographers of all skill levels.
2.3 Compatibility with Canon FD Lenses
The Canon AE-1 is designed to work seamlessly with Canon FD lenses, offering a wide range of creative possibilities. These lenses are known for their high optical quality and versatility, from wide-angle to telephoto and macro options. The FD mount system ensures secure and precise lens attachment, enabling manual focusing for precise control. Additionally, the AE-1 is compatible with older FL-mount lenses when used with an adapter, expanding its versatility. This compatibility makes the AE-1 a flexible choice for photographers seeking to explore various shooting styles and lens capabilities, ensuring optimal performance across different scenarios.
Loading Film into the Canon AE-1
Loading film into the Canon AE-1 is a straightforward process that ensures proper function and image quality. Always load film in low-light conditions to prevent exposure. Open the back, insert the film cartridge, and align it with the take-up spool. Advance the film to the first frame using the rapid rewind knob. Close the back and set the film speed for accurate exposures. Proper loading is essential for achieving sharp and well-exposed photographs with your Canon AE-1 camera;
3.1 Step-by-Step Guide to Film Loading
To load film into the Canon AE-1, start by opening the camera back. Pull the film cartridge tab and insert it into the film chamber, ensuring it clicks into place. Align the film leader with the red mark on the take-up spool. Gently pull the leader to seat it properly, then close the camera back until it clicks. Set the film speed using the dial on the lens mount. Finally, advance the film by turning the rapid rewind knob clockwise until it stops. This ensures the first frame is ready for shooting, providing a smooth start to capturing your images.
3.2 Setting the Film Speed
After loading the film, set the film speed by locating the film speed ring on the lens mount. Rotate the ring until the ISO number on the film cartridge aligns with the white marker. This ensures the camera’s metering system accurately calculates exposures. The Canon AE-1 supports film speeds from ISO 12 to 3200. Always use the speed rating specified on the film packaging for optimal results. If using filters or special effects, adjust the speed accordingly. Properly setting the film speed is crucial for achieving correctly exposed photographs with the Canon AE-1.
Understanding Aperture and Shutter Speed
Aperture and shutter speed are fundamental for controlling exposure. Aperture adjusts the lens opening, while shutter speed sets the exposure duration. Together, they create the desired visual effects in photography.
4.1 What is Aperture? How to Adjust It
Aperture is the opening in the camera lens that controls the amount of light entering. Measured in f-stops (e.g., f/2.8, f/8), a smaller f-stop means a larger aperture. On the Canon AE-1, aperture is adjusted using the aperture ring on the lens. Turning the ring clockwise decreases the aperture (higher f-stop), while counterclockwise increases it (lower f-stop). Aperture affects depth of field: a larger aperture (lower f-stop) blurs the background, while a smaller aperture (higher f-stop) sharpens more of the image. Proper adjustment ensures optimal exposure and desired creative effects.
4.2 Shutter Speed Settings and Their Effects
Shutter speed determines how long the camera’s shutter remains open, measured in seconds or fractions of a second. The Canon AE-1 offers settings from 1 second to 1/1000th of a second, plus a Bulb (B) mode for extended exposures. Faster speeds (e.g., 1/500th) freeze motion, ideal for sharp images in bright light. Slower speeds (e.g., 1 second) create motion blur, adding artistic effects. Flash sync is available at 1/60th of a second. Proper shutter speed selection balances motion capture and exposure, enhancing creative control over your photography.
Focusing Techniques
The Canon AE-1 features precise focusing mechanisms to ensure sharp images. Use the focus ring for manual adjustments or rely on built-in aids like split-image and microprism for accuracy.
5.1 Using the Focus Ring
The focus ring on the Canon AE-1 is located on the lens barrel and allows for precise manual focusing. To use it, rotate the ring clockwise or counterclockwise until your subject appears sharp in the viewfinder. The ring moves smoothly, enabling fine adjustments. For accurate focusing, align the subject with the microprism or split-image focusing aids in the viewfinder. Ensure the subject is well-lit for easier focusing. The ring’s tactile feedback helps in achieving sharp focus quickly, even in challenging lighting conditions.
5.2 Split-Image and Microprism Focusing Aids
The Canon AE-1 features split-image and microprism focusing aids in its viewfinder, designed to assist in achieving precise manual focus. The split-image aid divides the subject into two halves; when properly aligned, the images merge, indicating sharp focus. The microprism aid provides a textured, illuminated area in the center of the viewfinder, sharpening the preview of the subject. These tools work best with sufficient light and higher f-stops, ensuring accuracy and ease in focusing. Together, they enhance manual focusing efficiency, making it quicker and more reliable.
Exposure Compensation
Exposure compensation on the Canon AE-1 allows adjustments of ±2 stops to refine exposure settings. It helps in scenarios like backlighting or high-contrast scenes for better exposure control.
6.1 Adjusting Exposure Settings
Adjusting exposure settings on the Canon AE-1 allows for precise control over your photos. The camera features an exposure compensation dial, enabling you to increase or decrease exposure by up to ±2 stops in 1/3-stop increments. This is useful for correcting metered exposures in challenging lighting conditions. To adjust, simply rotate the dial while checking the viewfinder’s exposure meter. Positive values brighten the image, while negative values darken it. Ensure the meter needle aligns appropriately for desired results. This feature enhances creative control, helping achieve perfectly balanced exposures every time.
6.2 Positive and Negative Exposure Values
Exposure values (EV) on the Canon AE-1 allow you to adjust the brightness of your images. Positive EV values (+1, +2) make the image brighter by opening the aperture or slowing the shutter speed. Negative EV values (-1, -2) make the image darker by closing the aperture or speeding up the shutter. These adjustments are made in half-stop increments, giving precise control over exposure. Positive EVs are ideal for bright scenes, while negative EVs are better for low-light conditions. Use these settings to enhance your photos without overexposing or underexposing them.
- Positive EVs brighten highlights and reduce shadows.
- Negative EVs darken highlights and deepen shadows.
Adjust EVs in small increments to achieve the desired effect without overcorrection.
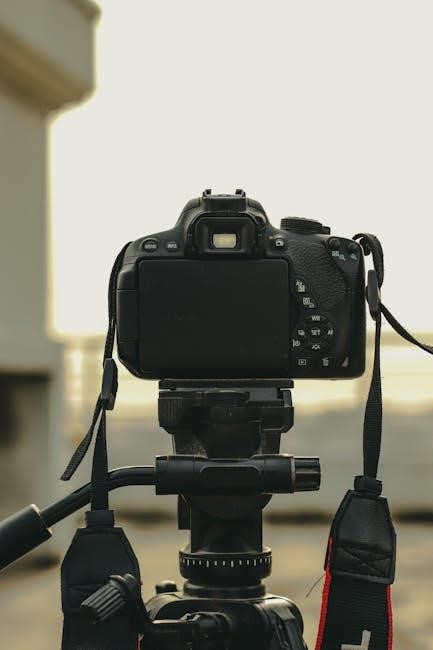
Using the Viewfinder
7.1 Understanding the Viewfinder Display
The Canon AE-1’s viewfinder provides a clear, uncluttered view of your subject, with a built-in light meter display. It shows shutter speed, aperture, and exposure indicators.
The viewfinder also features a microprism focusing aid and a split-image rangefinder for precise focus. This setup helps ensure accurate composition and exposure.
7.2 Built-In Light Metering System
The AE-1’s viewfinder includes a built-in light meter, offering precise exposure readings. It measures light through the lens, providing accurate aperture and shutter speed suggestions.
The meter is highly sensitive, operating in a wide range of lighting conditions. This feature is essential for achieving balanced exposures in both bright and low-light environments.
The Canon AE-1’s viewfinder provides essential shooting information, including aperture, shutter speed, and exposure metering. A built-in LED display shows arrows indicating overexposure (↑) or underexposure (↓), while a center dot confirms proper exposure. The viewfinder also features a microprism focusing aid for precise focus and a split-image rangefinder for aligning horizontal subjects. The display is designed to help photographers quickly assess and adjust settings for optimal results. Familiarity with the viewfinder’s layout is key for efficient and accurate shooting.
The Canon AE-1 features a built-in, through-the-lens (TTL) light metering system, ensuring accurate exposure measurements. It uses a silicon photocell to detect light passing through the lens, providing precise readings for both aperture and shutter speed. The system supports both manual and automatic modes, offering flexibility for photographers. The metering is center-weighted, focusing on the central area of the frame, which is ideal for portraits and balanced compositions. The LED display in the viewfinder shows recommended settings, making it easy to adjust for optimal results. This reliable system helps achieve well-exposed photos in various lighting conditions.
Advanced Shooting Modes
The Canon AE-1 offers advanced shooting modes for enhanced creativity. Programmed AE mode automates aperture and shutter speed for optimal exposures. Shutter-Speed Priority allows manual control over shutter speed. Manual mode enables full control for precise adjustments. These modes provide flexibility for mastering various photographic scenarios.
8.1 Programmed AE Mode
The Programmed AE (Auto-Exposure) mode on the Canon AE-1 offers a convenient and intuitive way to capture well-exposed images automatically. In this mode, the camera selects both the aperture and shutter speed based on the lighting conditions, ensuring a balanced exposure. To use Programmed AE, set the mode dial to “Program” and adjust the aperture ring to “A.” The camera will then automatically adjust the settings, allowing you to focus on composition and framing. This mode is ideal for beginners or situations where quick adjustments are needed, providing a hassle-free shooting experience while maintaining high image quality.
8.2 Shutter-Speed Priority AE Mode
In Shutter-Speed Priority AE Mode, you set the desired shutter speed, and the camera automatically adjusts the aperture to ensure proper exposure. This mode is ideal for controlling motion effects, such as freezing fast-moving subjects or creating blur for artistic effects. To use this mode, rotate the mode dial to “Tv” (Time Value). Use the shutter speed dial to select your preferred speed, and the camera will calculate the corresponding aperture. Note that in low-light conditions, the aperture may open to its maximum limit, so ensure your lens can accommodate the required exposure.
8.3 Manual Override for Creative Control
The Canon AE-1 allows photographers to take full creative control by switching to manual mode, overriding the camera’s automatic settings. This feature is ideal for experienced shooters who want precise control over aperture and shutter speed. By disabling the programmed auto-exposure, users can manually adjust settings to achieve specific artistic effects, such as intentional overexposure or underexposure. The manual override also enables the use of the depth of field preview button, allowing photographers to visualize the focus range before capturing the shot. This level of customization makes the AE-1 a versatile tool for creative photography.
Accessories for the Canon AE-1
The Canon AE-1 supports various accessories, including Canon FD lenses for enhanced optical performance and Speedlite flashes for improved lighting control in different photography conditions.
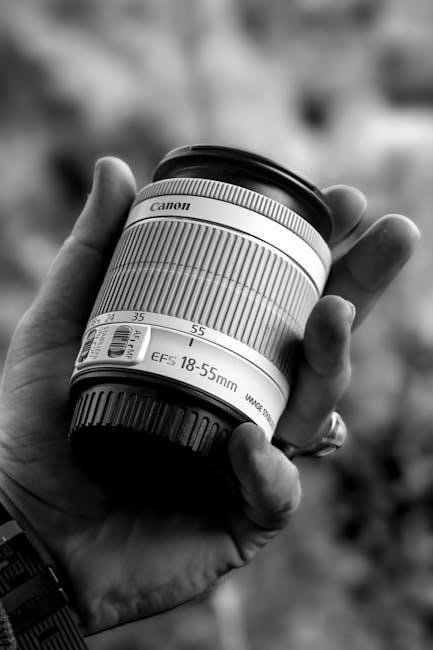
9.1 Canon FD Lenses
The Canon AE-1 is compatible with a wide range of Canon FD lenses, offering flexibility for various photographic needs. These lenses are designed to work seamlessly with the AE-1’s aperture priority and manual modes, ensuring precise control over exposure. Popular options include the 50mm f/1.8, 28mm f/2.8, and 70-200mm f/4 zoom lenses. FD lenses are known for their optical quality, durability, and manual focus design, making them ideal for both beginners and seasoned photographers. When using FD lenses, always ensure proper mounting to maintain optimal performance and camera functionality.
9.2 Speedlite Flash Compatibility
The Canon AE-1 is compatible with various Speedlite flashes, enhancing low-light photography. The built-in hot shoe and PC terminal enable seamless integration with flashes like the Speedlite 199A and 188A. These units provide precise flash metering and automatic adjustment for optimal exposure. Users can also manually adjust flash output for creative control. The AE-1’s compatibility with external flashes makes it versatile for studio and outdoor settings, ensuring well-lit images in challenging conditions. This feature underscores the camera’s adaptability for professional and amateur photographers alike.

Maintenance and Care
Regular maintenance is essential for the Canon AE-1’s functionality and longevity. Cleaning and proper storage are key to extending its use and ensuring optimal performance.
10.1 Cleaning the Camera and Lens
To maintain your Canon AE-1, clean the camera and lens regularly. Use a soft, dry cloth to wipe the exterior and remove surface dust. For the lens, gently rub with a microfiber cloth or lens tissue. Avoid harsh chemicals or excessive pressure, which can damage coatings. Clean the viewfinder and mirror with a cotton swab or soft brush. For stubborn smudges, dampen the cloth slightly but avoid liquids. Never touch the lens surface with bare hands, as oils can leave residue. Regular cleaning ensures optimal performance and image quality.
10.2 Storing the Camera Properly
Proper storage is essential to maintain the Canon AE-1’s functionality and longevity. Store the camera in a cool, dry place away from direct sunlight and moisture. Use a protective case or pouch to shield it from dust and physical damage. Avoid extreme temperatures, as they can harm the camera’s internal mechanisms. For long-term storage, remove the battery to prevent corrosion. Consider using silica gel packets to absorb humidity. Always clean the camera and lens before storing to prevent dirt from causing damage over time. Proper storage ensures your Canon AE-1 remains in excellent condition for years.
- Use a dry, cool environment.
- Protect from sunlight and moisture.
- Remove batteries for long-term storage.
- Clean the camera before storing.

Troubleshooting Common Issues
Identify and resolve common issues with your Canon AE-1. Check for jammed shutters, incorrect exposures, or battery faults. Clean the camera regularly to prevent malfunctions.
For shutter speed issues, ensure the shutter is not stuck due to dirt or old lubricants. Use a soft brush to gently clean moving parts.
Exposure errors may occur due to incorrect film speed settings. Double-check the ISO dial alignment and ensure the light meter is functioning properly.
11.1 Shutter Speed Malfunctions
Shutter speed malfunctions on the Canon AE-1 can occur due to mechanical wear or dirt buildup. Common issues include stuck or slow-moving shutters, leading to overexposed or blurry images. If the shutter fails to close properly, it may result in persistent light leaks. To address this, clean the shutter mechanism with compressed air or a soft brush. For severe cases, replace the shutter curtains or have the camera serviced by a professional; Always ensure the battery is fresh, as low power can cause inconsistent shutter behavior. Regular maintenance is key to preventing such issues.
- Clean the shutter mechanism regularly.
- Check for worn-out shutter curtains.
- Ensure proper battery power for consistent operation.
11.2 Exposure Errors and Adjustments
Exposure errors on the Canon AE-1 often occur due to incorrect metering or settings. Overexposure can result in blown-out highlights, while underexposure may darken shadows excessively. To identify issues, check the built-in light meter, which displays a needle indicating exposure levels. If the needle exceeds the scale, adjust the aperture or shutter speed accordingly. Use the exposure compensation dial to fine-tune settings by ±2 stops. For persistent errors, verify film speed settings and ensure the lens is clean. Bracketing shots can also help capture the desired exposure. Regularly testing and adjusting settings ensures optimal results. Always review your photos to refine techniques.

Tips for New Users
Start by familiarizing yourself with the camera’s controls and modes. Practice loading film and adjusting settings in a well-lit environment. Experiment with aperture and shutter speed combinations to understand their effects on photos. Always carry extra batteries and lenses for versatility. Regularly clean the lens and viewfinder to ensure optimal performance. For better results, shoot in manual mode and review your photos to learn from mistakes. Handle film carefully to avoid exposure to light. Keep the camera stored in a dry, cool place when not in use. Use a tripod for sharper images in low-light conditions. Read the Canon AE-1 manual thoroughly to unlock all features and capabilities. Join photography communities or workshops to gain insights and tips from experienced users. Lastly, be patient and enjoy the creative process of shooting with film!
12.1 Getting Familiar with the Camera
Familiarizing yourself with the Canon AE-1 is essential for optimal use. Start by understanding the camera’s layout, including the lens mount, mode dial, and shutter button. The viewfinder provides critical information like aperture, shutter speed, and exposure warnings. Practice loading film and adjusting settings to build muscle memory. New users should experiment with different modes, such as Program AE, to see how the camera responds. Reading the manual thoroughly and practicing regularly will help you master the camera’s capabilities and improve your photography skills over time.
12.2 Best Practices for Better Photos
To capture stunning images with the Canon AE-1, focus on composition by using the rule of thirds and leading lines. Experiment with natural light, avoiding harsh midday sun, and opt for golden hour for warm tones. Use the split-image microprism for sharp focus and adjust aperture and shutter speed based on your scene. Load film in low-light conditions to prevent exposure and store it in a cool, dry place. Regularly clean the lens and viewfinder to ensure clarity. Practice with different modes and settings to understand their effects on your photos.
The Canon AE-1 remains a timeless classic in photography, offering unparalleled control and creativity. Its manual provides essential guidance for mastering this iconic camera.
With practice and exploration, photographers can unlock the AE-1’s full potential, capturing stunning images that stand the test of time. Happy shooting!
13.1 Final Thoughts on the Canon AE-1
The Canon AE-1 is a legendary camera that combines simplicity, durability, and creative control, making it a timeless choice for photographers. Its intuitive design and robust features have cemented its place as a favorite among both amateurs and professionals. Whether you’re shooting in manual mode or relying on its advanced auto-exposure systems, the AE-1 delivers exceptional results. With proper care and maintenance, this camera can continue to produce stunning images for decades. It’s not just a tool but a gateway to understanding the fundamentals of photography, offering endless opportunities for creative growth and artistic expression.
13.2 Resources for Further Learning
For further learning, explore the official Canon AE-1 manual available on Canon’s website or through authorized retailers. Online forums like DPReview and Fred Miranda offer detailed discussions and user experiences. Books such as “Canon AE-1: The Complete Guide” by Brian Silvester provide in-depth insights. YouTube channels like Tony & Chelsea Northrup and Mike Janowiak share practical tutorials. Additionally, join Facebook groups or Reddit communities dedicated to film photography for hands-on tips and advice from experienced users. Local photography workshops or clubs can also offer practical guidance and hands-on experience with the Canon AE-1.